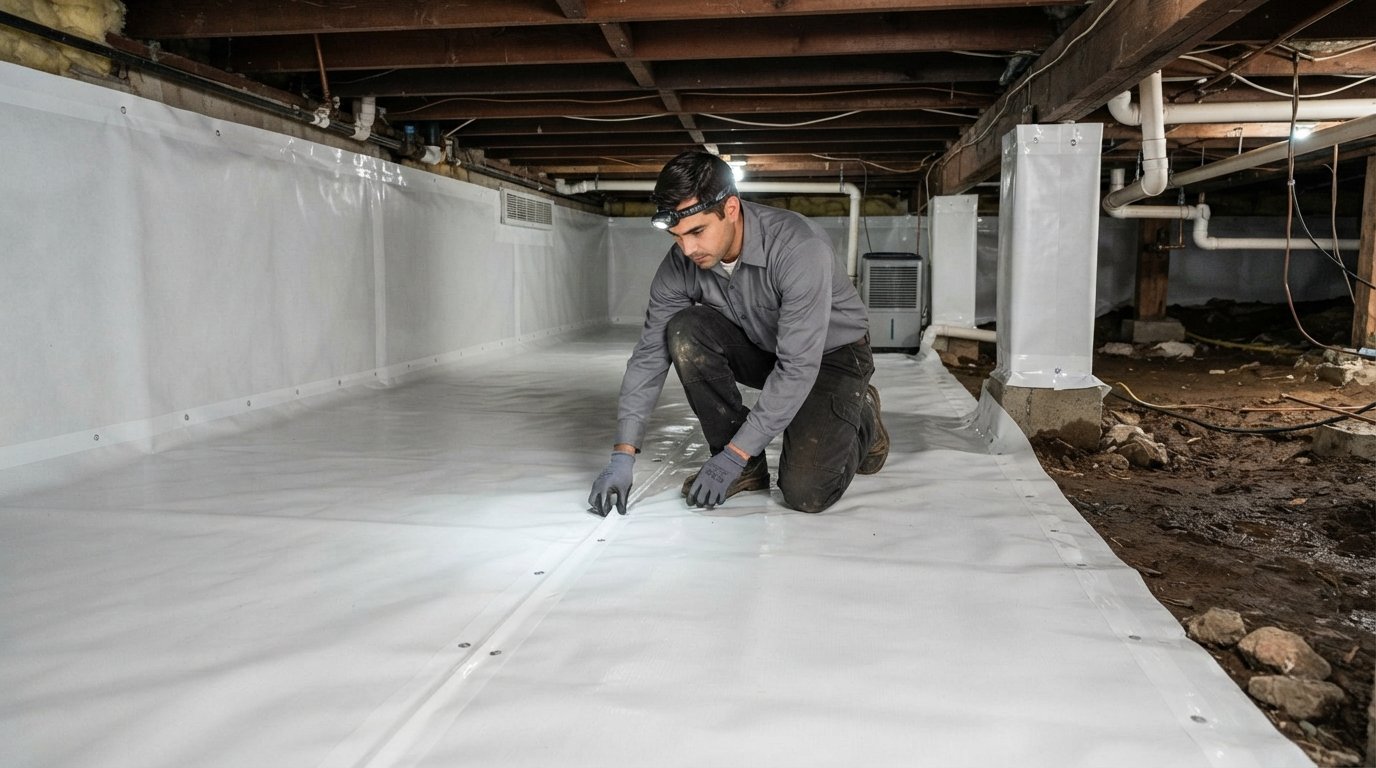
Crawl space encapsulation is a moisture-control method that seals the crawl space from ground vapor and unwanted outdoor air. A typical system may include a heavy-duty vapor barrier, sealed vents and openings, foundation-wall treatment, drainage improvements, and humidity control.
For homeowners dealing with a damp, musty, humid, or mold-prone crawl space, encapsulation can help protect the structure and improve the condition of the space. However, it is not a universal solution. Standing water, plumbing leaks, drainage problems, and structural damage should generally be addressed before the space is sealed.
What Is Crawl Space Encapsulation?
Crawl space encapsulation involves creating a controlled environment beneath the home by separating the crawl space from moisture coming from the soil and humid outdoor air.
The system commonly involves:
- A vapor barrier over exposed soil
- Sealing seams and penetrations
- Sealing or otherwise properly managing crawl-space vents
- Treating foundation walls
- Controlling humidity
- Improving drainage where necessary
- Installing a dehumidifier when appropriate
The exact configuration depends on the home’s design, climate, moisture conditions, and applicable building requirements.
The goal is not simply to cover the dirt floor with plastic. A properly planned encapsulation system manages moisture, air movement, and humidity together.
The official Crawl Space Encapsulation site similarly describes encapsulation as a method for controlling ground moisture and explains that unvented crawl spaces require appropriate ground vapor protection.
How Does Crawl Space Encapsulation Work?
An encapsulated crawl space works by reducing the pathways through which moisture and humid air enter the area.
A typical system may use:
- Ground vapor barrier — Covers exposed soil to reduce moisture vapor entering the crawl space.
- Wall sealing — Extends moisture protection along appropriate foundation surfaces.
- Sealed seams — Keeps gaps between sections of liner from becoming moisture pathways.
- Air sealing — Addresses vents, doors, utility penetrations, and other openings.
- Humidity control — A properly sized dehumidifier or another approved strategy may be necessary.
- Drainage — A sump pump, French drain, grading correction, or other drainage solution may be required if water is entering the space.
Building requirements can vary, so the final system should comply with applicable local codes rather than relying on a generic installation recipe.
What Are the Benefits of Crawl Space Encapsulation?
1. Helps Control Ground Moisture
Bare soil can continuously release water vapor into a crawl space. A properly installed vapor barrier reduces that moisture source.
This is one of the primary reasons homeowners consider encapsulation.
2. Helps Reduce Humidity
Reducing moisture entry makes it easier to maintain a controlled humidity level.
This can be particularly useful in humid climates or homes with persistently damp crawl spaces.
3. Helps Protect Wood and Structural Components
High moisture levels can contribute to conditions favorable to wood decay.
Encapsulation does not repair already damaged structural components, but moisture control can help reduce the conditions that contribute to future deterioration.
4. Can Reduce Musty Odors
Damp crawl spaces can produce unpleasant odors that may migrate into the home.
Reducing moisture and improving air control can help address one source of those odors.
5. Can Improve the Crawl Space Environment
A properly managed crawl space is easier to inspect, maintain, and monitor than a consistently damp and neglected one.
6. May Improve Energy Performance
Sealing and insulating a crawl space can reduce unwanted heat transfer in some homes.
However, energy savings vary substantially depending on the home’s construction, climate, insulation, HVAC system, and installation quality. Energy efficiency should therefore be considered a potential benefit rather than a guaranteed payback.
When Should You Consider Crawl Space Encapsulation?
Encapsulation may be worth investigating if you notice:
- Persistent dampness
- High crawl-space humidity
- Musty odors
- Condensation
- Mold growth
- Damp or deteriorating insulation
- Moisture coming through the soil
- Repeated moisture-related problems
- Poorly controlled crawl-space air
A professional inspection can help determine whether the problem is actually caused by ground vapor, drainage, plumbing, ventilation, or another source.
What Should You Fix Before Encapsulating a Crawl Space?
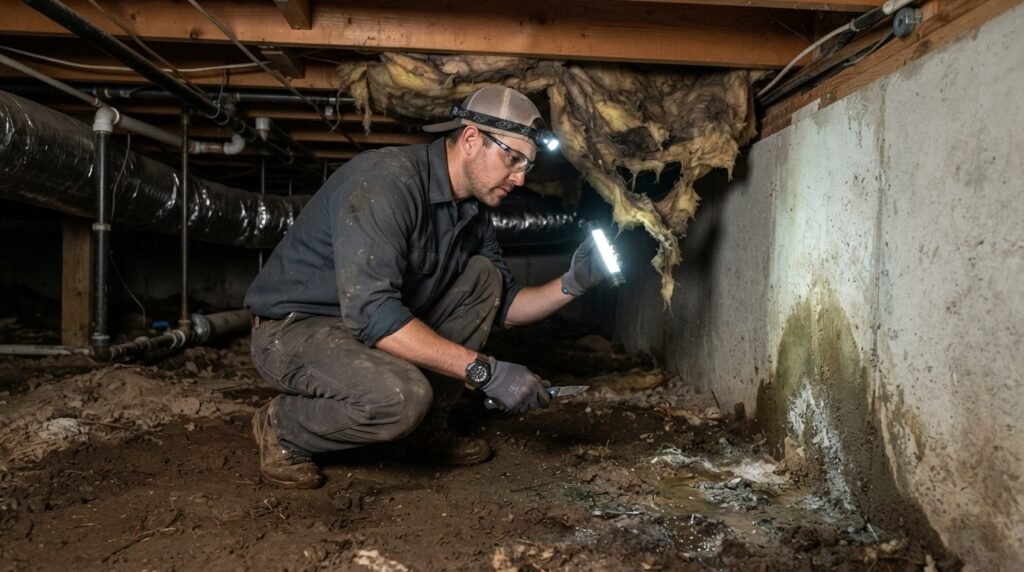
This is one of the most important parts of the project.
Do not assume that encapsulation itself fixes every moisture problem.
Before sealing the crawl space, investigate:
Standing Water
If water regularly collects under the house, the source needs to be controlled first.
Possible solutions may include:
- Drainage improvements
- French drains
- Sump pumps
- Downspout corrections
- Grading improvements
- Plumbing repairs
Plumbing Leaks
A leaking pipe can continue introducing moisture even after a vapor barrier is installed.
Structural Damage
Rotten joists, damaged beams, foundation problems, or other structural issues need separate attention.
Existing Mold
Mold remediation may be required depending on the extent and cause of the contamination.
Current industry guidance similarly emphasizes fixing active water and structural problems before treating encapsulation as the final moisture-control layer.
What Materials Are Used for Crawl Space Encapsulation?
The exact materials vary by project, but a complete system may include:
- Reinforced polyethylene vapor barrier
- Seam tape
- Mechanical fasteners
- Sealants
- Foundation-wall insulation
- Rigid foam board
- Crawl-space dehumidifier
- Sump pump
- Drainage components
- Access-door seals
- Vent-sealing materials
The vapor barrier is particularly important because its thickness, durability, attachment method, and seam treatment affect the overall quality of the installation.
How Much Does Crawl Space Encapsulation Cost?
There is no single price because crawl spaces differ dramatically in size and condition.
Current 2026 cost guides commonly place professional encapsulation in the roughly $3,000–$15,000+ range, while more complex projects can exceed that range. HomeAdvisor currently reports a typical professional range of about $5,000–$15,000, while HomeGuide reports approximately $3,000–$15,000.
Cost can increase when the project requires:
- Mold remediation
- Structural repairs
- Drainage installation
- A sump pump
- Dehumidification
- Insulation
- Removal of old insulation
- Extensive cleaning
- Difficult crawl-space access
What Determines the Final Price?
The biggest factors are:
Crawl-space size: Larger spaces require more material and labor.
Existing condition: A clean, dry crawl space costs less to prepare than one with water, mold, damaged insulation, or structural problems.
Barrier quality: Thicker, reinforced liners generally cost more than basic plastic sheeting.
Drainage: Active groundwater may require additional waterproofing work.
Equipment: A properly sized dehumidifier or sump system adds to the investment.
Labor: Tight access and complicated layouts can substantially increase installation time.
This is why comparing quotes based only on the final dollar amount can be misleading.
Is Crawl Space Encapsulation Worth It?
It can be, particularly when the crawl space has a persistent moisture or humidity problem.
Encapsulation is more compelling when a home has:
- Recurring humidity
- Damp soil
- Musty odors
- Moisture-related deterioration
- Mold caused by persistent moisture
- A vented crawl space in a humid environment
It may be less necessary when the crawl space is already dry, stable, and appropriately protected.
In some situations, a properly installed vapor barrier may address the primary ground-vapor problem without requiring the full scope of a complete encapsulation system.
The key is to match the solution to the actual problem.
Crawl Space Encapsulation vs. Vapor Barrier
These terms are sometimes used interchangeably, but they do not necessarily describe the same scope.
A vapor barrier primarily addresses moisture vapor coming through the ground.
Encapsulation generally describes a broader moisture- and air-control system that may include:
- Ground and wall liner
- Sealed seams
- Closed or properly managed vents
- Air sealing
- Humidity control
- Drainage
- Insulation
Therefore, if your crawl space only has exposed soil and elevated ground moisture, a vapor barrier may be enough.
If the space has broader humidity, air-leakage, or moisture-management problems, a more complete encapsulation system may make more sense.
What Is the Crawl Space Encapsulation Process?
A professional project commonly follows a sequence similar to this:
1. Inspect the Crawl Space
The contractor identifies:
- Moisture sources
- Plumbing leaks
- Mold
- Damaged wood
- Standing water
- Pest activity
- Insulation problems
2. Correct Water Problems
Drainage and plumbing issues should be addressed before the space is sealed.
3. Clean and Prepare the Area
Debris, damaged materials, and unsuitable insulation may need to be removed.
4. Install the Vapor Barrier
The liner is placed across exposed soil and appropriately secured to the foundation surfaces.
5. Seal Seams and Penetrations
Joints, corners, access openings, and utility penetrations need careful attention.
6. Address Foundation Walls
Depending on the design, foundation walls may receive insulation or vapor-control treatment.
7. Seal Appropriate Openings
Vents and other openings are handled according to the selected crawl-space design and local requirements.
8. Install Humidity or Drainage Equipment
If required, the project may include a dehumidifier, sump pump, or drainage system.
9. Inspect the Completed System
The finished installation should be checked for gaps, loose sections, damaged liner, drainage problems, and humidity-control performance.
A comparable nine-step process is also outlined by Aqviz, although the exact installation approach should be adapted to the individual property and applicable requirements.
Can You DIY Crawl Space Encapsulation?
Small portions of crawl-space work can sometimes be handled by experienced homeowners, but full encapsulation is more complicated than installing plastic over a dirt floor.
Potential complications include:
- Moisture diagnosis
- Drainage
- Mold
- Structural damage
- Electrical equipment
- Dehumidification
- Tight working conditions
- Proper sealing
- Building-code requirements
A poorly designed system can fail to solve the underlying moisture problem.
For a simple ground-vapor issue, a homeowner may be able to research vapor-barrier options. But projects involving standing water, structural damage, electrical work, mold, or major drainage should be evaluated by qualified professionals.
What Are the Disadvantages of Crawl Space Encapsulation?
Encapsulation has real advantages, but it also has drawbacks.
Higher Upfront Cost
A complete system can cost thousands of dollars.
Ongoing Equipment Maintenance
A sealed crawl space may rely on a dehumidifier or drainage equipment that requires maintenance and electricity.
Poor Installation Can Create Problems
Sealing a space without dealing with active water can trap moisture instead of solving it.
It Is Not a Structural Repair
Encapsulation will not straighten sagging floors or repair rotten beams.
Radon and Combustion Safety Need Attention
Changing how a crawl space is ventilated can affect soil-gas movement and the environment around combustion appliances.
Current specialist guidance specifically highlights radon testing and combustion-appliance safety as issues homeowners should consider when sealing a crawl space.
How Long Does Crawl Space Encapsulation Last?
The lifespan depends heavily on:
- Liner quality
- Installation quality
- Crawl-space conditions
- Drainage
- UV exposure
- Pest damage
- Foot traffic
- Equipment maintenance
The encapsulation liner itself can potentially remain serviceable for many years, but it should not be treated as a completely maintenance-free installation.
Inspect the space periodically for:
- Torn liner
- Loose seams
- Standing water
- High humidity
- Pest damage
- Dehumidifier problems
- Drainage blockages
Can an Encapsulated Crawl Space Still Get Mold?
Yes, if the system is poorly designed or maintained.
Encapsulation should reduce the conditions that encourage mold, but it does not magically make moisture impossible.
Mold can still become a problem if:
- Water enters from outside
- A pipe leaks
- The dehumidifier fails
- Drainage becomes blocked
- The liner is damaged
- Humidity remains high
- Existing contamination is not properly addressed
The goal is therefore moisture control, not simply covering the crawl space.
Can Mice and Other Pests Enter an Encapsulated Crawl Space?
Yes.
Encapsulation can reduce some pest entry points, but it is not automatically a complete pest-control system.
Rodents can enter through:
- Foundation openings
- Utility penetrations
- Damaged liners
- Poorly sealed access doors
- Gaps around pipes
Pest exclusion should be treated as a separate part of the overall project where necessary.
How to Compare Crawl Space Encapsulation Quotes
Don’t compare contractors on price alone.
Ask each contractor to specify:
- Vapor-barrier thickness
- Where the liner will be installed
- How seams will be sealed
- How foundation walls will be treated
- Which vents/openings will be sealed
- Whether drainage is included
- Whether a dehumidifier is included
- Whether insulation is included
- Whether mold remediation is included
- Warranty coverage
- Maintenance requirements
- What happens if water enters later
A $5,000 quote and a $12,000 quote may be describing completely different systems.
Frequently Asked Questions
1. What is crawl space encapsulation?
It is a moisture- and air-control approach that seals a crawl space using a vapor barrier and other components designed to reduce ground moisture, humidity, and unwanted air movement.
2. How much does crawl space encapsulation cost?
A common 2026 planning range is approximately $3,000 to $15,000 or more, depending on size, condition, drainage, equipment, materials, and labor.
3. Is crawl space encapsulation worth it?
It can be worthwhile for homes with persistent moisture, humidity, musty odors, or other crawl-space moisture problems. It may be unnecessary for a genuinely dry, well-controlled crawl space.
4. Does encapsulation prevent mold?
Proper moisture control can significantly reduce conditions that support mold growth, but existing mold and active water problems need to be addressed separately.
5. Does an encapsulated crawl space need a dehumidifier?
Not every system uses the exact same approach, but humidity control is an important consideration in sealed crawl spaces, particularly in humid climates. Current guidance frequently includes dehumidification as part of the system.
6. Is encapsulation the same as waterproofing?
No. Waterproofing focuses primarily on preventing or managing liquid water intrusion. Encapsulation is broader and focuses on moisture vapor, air control, and humidity management.
7. Can encapsulation increase home value?
It can improve a home’s condition and appeal by addressing moisture problems, but homeowners should not assume the project will return its full cost at resale. The financial benefit depends on the property and local market.
Final Verdict
Crawl space encapsulation can be an effective long-term moisture-management strategy, but the right system depends on the condition of the crawl space. The most important step is diagnosing the moisture source first. If the crawl space has standing water, leaks, structural damage, or serious drainage problems, those issues should be addressed before treating encapsulation as the final solution.
For a persistently damp or humid crawl space, a properly designed system combining a durable vapor barrier, appropriate sealing, drainage where necessary, and reliable humidity control can provide substantially better protection than simply covering the ground with plastic. The best investment is therefore not necessarily the most expensive encapsulation system. It is the system that addresses the actual moisture problem and is installed correctly.
Related Post
- Phyllis Fierro – Biography, Career, Marriage to Ralph Macchio, Family and Life!
- Fintechzoom .Com – What It Is, Markets, Features, and What You Should Know!
- Seo Agency In Usa Glorvix – Services, Evaluation, and What Businesses Should Know!
About the Author