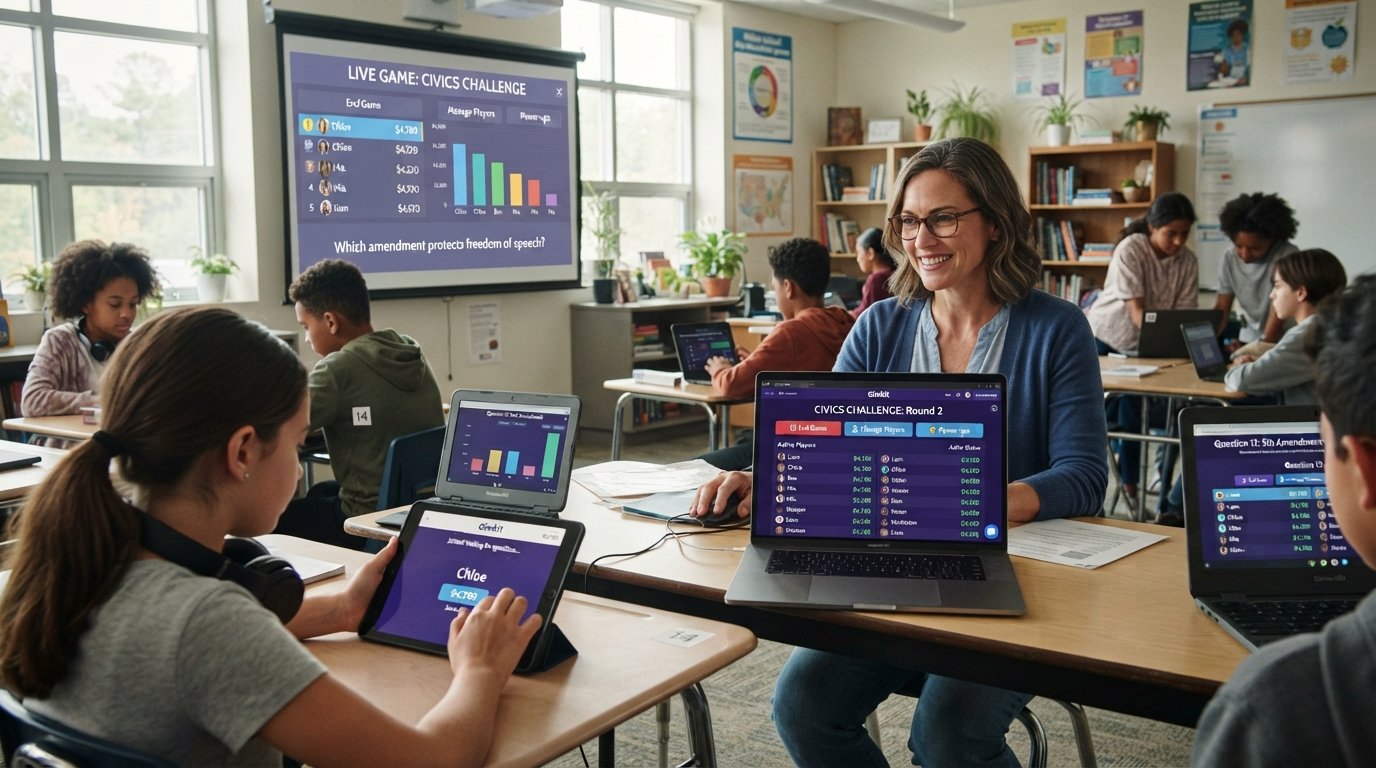
A Gimkit host is the person who sets up and manages a live Gimkit game. The host chooses a Kit, selects a game mode, adjusts the available game options, shares the game code or join link, and starts the session once players are ready.
If you’re hosting Gimkit for the first time, the process is straightforward: choose a Kit, click Play Live, select a mode, configure the game, share the joining information, and start the game. The details below explain each step and the settings that matter most.
What Is a Gimkit Host?
A Gimkit host is the person responsible for running a live game session.
In a typical classroom, the host is the teacher. The host controls the setup while students join from their own devices and participate in the game.
The host generally handles:
- Choosing the Kit
- Selecting the game mode
- Setting game options
- Connecting a class when appropriate
- Sharing the game code, QR code, or link
- Checking players in the lobby
- Starting the game
- Monitoring the session
- Ending the game when necessary
Gimkit’s current hosting instructions describe this as a live-game workflow rather than a separate product or application called “Gimkit Host.”
How to Host a Gimkit Game Step by Step
Once your Kit is ready, the actual hosting process is fairly quick.
1. Choose a Kit
Start from your Gimkit dashboard and select the Kit you want to use.
A Kit is the question set that powers the game. You can use an existing Kit rather than creating a new one immediately before class.
Gimkit’s current instructions say you can click Play Live beside a Kit on the dashboard or open the Kit and choose Play Live from there.
2. Click Play Live
After selecting your Kit, choose Play Live.
This takes you to Gimkit’s Mode Picker, where you can browse the available game modes.
If you’re unfamiliar with a mode, Gimkit provides a Learn More option so you can review how it works before selecting it.
3. Select a Game Mode
Choose the mode that fits your lesson.
Different modes can produce very different classroom experiences. Some are better for quick competitive review, while others emphasize teamwork, strategy, interaction, or longer gameplay.
If you’re hosting Gimkit for the first time, don’t choose a complicated mode simply because it looks interesting. Consider how much time you have to explain the rules and whether students already understand how Gimkit works.
After choosing a mode, click Continue.
4. Configure the Game Options
The Game Options screen is where you customize the session.
Depending on the selected mode, you may be able to configure things such as:
- Game goals
- Whether students can join late
- Class connections
- Nickname Generator
- Mode-specific settings
- Time or other conditions used to finish the game
The available options vary by game mode, so don’t expect every setting to appear in every Gimkit game.
5. Open the Lobby
After you finish the settings and continue, Gimkit opens a Lobby.
This is where students gather before the game begins.
You’ll see the game’s unique code, and in supported modes you’ll also see additional lobby information. In non-2D games, the lobby gives you an opportunity to review player names before starting.
This is a good moment to make sure:
- Your students are joining the correct game.
- Everyone has entered successfully.
- Names are appropriate.
- Your game settings are correct.
6. Share the Game Code, QR Code, or Join Link
Students have several ways to join.
You can provide them with:
- Game code
- QR code
- Join link
Gimkit says students can go to gimkit.com/join and enter the game code. If you’re using Classes and students are logged in appropriately, the joining process can be more direct.
You can also display the QR code from the host screen, which can be convenient when students are using phones or tablets.
7. Start the Game
Once your students are ready, click Start Game.
The location of the button differs between 2D and non-2D modes, but Gimkit’s current hosting guide identifies the Start Game control in the lobby.
Your students are then taken into the live session.
How Do Students Join a Gimkit Game?
Joining is usually easier than hosting.
Students can use the information displayed by the host:
- Go to gimkit.com/join.
- Enter the game code.
- Enter or approve their name, depending on the host’s settings.
- Wait in the lobby.
- Enter the game when the host starts it.
Students may also use a QR code or join link supplied by the host.
If you’re using Classes, students who are logged into Gimkit can have a more streamlined joining experience.
Do Students Need a Gimkit Account?
For a standard live game, students can generally join through the provided game code, QR code, or link without needing to create an individual Gimkit account just to participate.
The host, however, needs an account to create Kits and host games.
That distinction is useful because a teacher can set up the activity while students simply use the joining information provided on the host screen.
What Can a Gimkit Host Control?

The host screen provides several controls for managing a live session.
Depending on the game mode, these can include:
- Viewing the leaderboard
- Viewing players
- Managing sound and music
- Removing players
- Ending the game
- Managing the host’s own 2D-game participation
- Monitoring the remaining game time
For 2D games specifically, Gimkit documents controls for viewing players, switching between players while spectating, adjusting sound, displaying the leaderboard, and ending the game early.
Can a Gimkit Host Remove a Player?
Yes.
Gimkit provides a player-removal option for live games. This can be useful if someone joins the wrong session or uses an inappropriate name.
You can check the lobby before the game starts and manage players during the session where the relevant host controls are available.
For a classroom environment, checking the lobby before pressing Start Game is usually the simplest way to catch problems early.
How Do You Add More Time to a Gimkit Game?
In supported 2D live games, the host can use the game timer to add time during the session.
Gimkit’s current documentation explains that clicking the timer can add one minute, subject to the game’s maximum time rules.
This can be useful if students are still actively working and you want to extend the review without restarting the session.
Can You Host Gimkit for Free?
Yes. Gimkit offers a Basic option at no cost, although some game modes and features are limited compared with Pro.
The exact availability of free modes can change, so it’s better to check Gimkit’s current plan information rather than assuming that every game mode is permanently available on the free tier.
For teachers who only need occasional live review games, Basic can be a practical way to start.
Gimkit Basic vs. Pro for Hosting
The biggest reason to consider Pro is access to additional capabilities rather than simply the ability to host a game.
Gimkit’s current documentation says Pro provides access to all game modes and additional features, while Basic has restrictions around some Pro-exclusive modes.
| Area | Basic | Pro |
|---|---|---|
| Live games | Yes | Yes |
| Kits | Yes | Yes |
| Some game modes | Limited/rotating | Full access |
| Pro-exclusive modes | Restricted | Included |
| Assignments | More limited | Included |
| Additional media capabilities | Limited | More extensive |
If you’re only running occasional review sessions, start with Basic and determine whether its available modes meet your needs.
If you regularly use Gimkit and need its broader game-mode and feature library, Pro may make more sense.
How Many Students Can Join a Gimkit Game?
Gimkit’s hosting documentation includes hard limits that can vary by game type.
The current Help Center identifies a 500-player hard limit for live games, while 2D games have a 60-player hard limit. It also documents additional restrictions for Basic users using Pro-exclusive modes.
For most ordinary classrooms, these limits are unlikely to be the main concern.
However, large schools, events, workshops, or multi-class sessions should check the current limits for the specific mode before starting.
How to Choose the Right Gimkit Game Mode
Don’t choose a mode solely because it is popular.
Think about your learning objective.
For quick review
Choose a straightforward mode that lets students begin answering questions quickly.
For collaborative activities
A team-oriented mode can make more sense when you want students working together.
For longer sessions
A mode with additional gameplay or strategy can keep a longer review session from becoming repetitive.
For first-time Gimkit users
Start with a simpler mode.
The less time you spend explaining complicated mechanics, the more time students can spend on the actual questions.
Gimkit’s own Mode Picker is designed to help hosts explore available modes and read more about them before choosing one.
What Should You Do Before Hosting a Gimkit Game?
A little preparation can prevent most classroom problems.
Quick pre-game checklist
- Have your Kit ready.
- Check that the questions are correct.
- Choose your game mode before students arrive.
- Review the available game options.
- Check the expected number of players.
- Decide whether late joining should be allowed.
- Test the classroom internet connection.
- Decide whether you’ll display a QR code or game code.
- Keep the host screen visible.
- Have a backup activity if the network fails.
This takes less time than trying to solve a configuration problem while 30 students are waiting.
Common Gimkit Hosting Problems and Fixes
Students Can’t Join
First, verify the game code.
Students should go to gimkit.com/join and enter the code displayed on the host’s screen.
If the code is correct, check:
- internet connection,
- whether students are using the correct join page,
- whether the game is still open,
- whether the class has reached the relevant player limit.
The QR Code Isn’t Working
Don’t rely exclusively on the QR code.
Display the game code as a backup and provide the join link when possible.
Students can manually enter the code through Gimkit’s join page.
A Student Has the Wrong Name
Check the lobby before starting.
Gimkit’s hosting workflow allows the host to review player names in the lobby and remove inappropriate players where applicable.
You can also use the Nickname Generator when the selected game mode supports that option.
The Game Feels Too Long
Use the game options to establish an appropriate goal before starting.
For supported 2D games, the host can also add time during the game when necessary.
For a short classroom review, it’s generally better to finish while students are still engaged rather than letting the activity drag on.
Too Many Students Are Trying to Join
Check the limits for your selected game mode.
The maximum isn’t identical across all Gimkit experiences, particularly for 2D games and certain plan/mode combinations.
What Happens After a Gimkit Game?
The game doesn’t have to be the end of the learning activity.
The results can help you determine:
- which questions students struggled with,
- which concepts may need reteaching,
- how individual students performed,
- and which topics deserve another review.
This is one reason a live Gimkit session can work as more than just a classroom game: the results can become part of your next teaching decision.
Gimkit Host vs. Gimkit Player
The distinction is simple:
| Gimkit Host | Gimkit Player |
|---|---|
| Sets up the game | Joins the game |
| Chooses the Kit | Answers questions |
| Selects the game mode | Participates in gameplay |
| Configures options | Plays according to the selected rules |
| Shares the code/link | Uses the code/link |
| Starts the game | Waits for the host to start |
| Monitors the session | Competes or collaborates |
The host is essentially the person running the live session, while players participate in it.
How to Make a Gimkit Hosting Session Run Smoothly
A successful session usually depends more on preparation than complicated settings.
Keep the first game simple
If your students have never used Gimkit, don’t introduce several unfamiliar mechanics at once.
Display the joining information clearly
Put the code or QR code somewhere every student can see.
Check the lobby
Don’t immediately click Start Game. Make sure the expected students have joined first.
Keep the host screen accessible
You’ll need it to monitor the game and use host controls.
Review the results
Use the outcome of the game to identify topics that need additional explanation.
Gimkit Host FAQs
1. What is a Gimkit host?
A Gimkit host is the person who creates and manages a live Gimkit game. The host chooses the Kit and game mode, configures the available options, shares the joining information, starts the game, and manages the session.
2. How do I host a Gimkit game?
Choose a Kit, click Play Live, select a game mode, configure the game options, continue to the lobby, share the game code/QR code/link, and click Start Game.
3. How do students join a Gimkit game?
Students can go to gimkit.com/join, enter the game code and follow the joining instructions. They may also use a QR code or join link provided by the host.
4. Can I host Gimkit for free?
Yes. Gimkit has a free Basic option, although access to some modes and features is more limited than with Pro.
5. Do students need a Gimkit account?
Students can join standard live games using the host’s game code, QR code, or link without necessarily creating an account just to participate. Classes can provide a more integrated joining experience.
6. How many players can join Gimkit?
The current Help Center documents a 500-player hard limit for live games and a 60-player limit for 2D games, with additional restrictions applying in certain Basic/Pro situations.
7. Can a host remove a player?
Yes. Gimkit provides host controls for removing players during live games, including from the lobby and through relevant in-game controls.
8. Can students join after a Gimkit game starts?
Whether late joining is available depends on the game’s settings and mode. Gimkit provides a Join in Late option in the Game Options screen for supported live games.
9. Can a Gimkit host end a game early?
Yes. The host can use the End Game control to finish a live game early.
10. What should I do if Gimkit isn’t working?
Check the game code, internet connection, player limit, browser/device connection, and Gimkit’s current service status. If students cannot join, use the code or join link manually instead of relying only on the QR code.
Final Thoughts
Being a Gimkit host is essentially about running the live side of a Gimkit learning activity. Once your Kit is ready, the core process is simple: choose the Kit, select Play Live, pick a mode, configure the options, open the lobby, share the joining information, and start the game.
For a first session, keep the setup simple and give students clear joining instructions. Once you’re comfortable with the basics, you can experiment with different game modes, host controls, and classroom strategies.
The most important thing is to treat Gimkit as a teaching tool rather than just a game. A well-chosen Kit, appropriate game mode, and review of the results afterward can make the live session much more useful.
Related Post
- What Is A Smart Tv Box – How It Works, Features, Benefits, and More!
- Solidarity Definition – Meaning, Examples, Synonyms, and How to Use It!
- Inurl:Spatial – What It Means, How It Works, and How to Use It!
About the Author





1 thought on “Gimkit Host – How to Host a Live Game, Manage Players, and Troubleshoot Issues!”